Annotations are highlighted areas of an image with/without descriptions. You are able to make annotations at any time after logging in. Only you will see them, unless you choose to share them with others.
- To create a layer, click Add Layer and give your layer a title and optional description. When finished, click Done to save your layer.
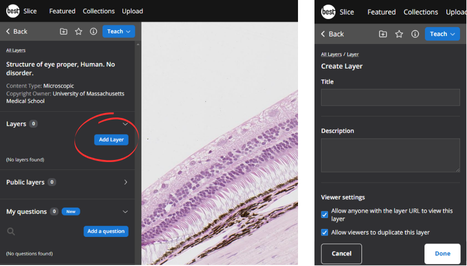
- To start marking features on your layer, click Annotate
- In the left panel, give the annotation a name and description.
- Select either the PIN, one of the shapes (POLYGON, ELLIPSE or RECTANGLE)
_bf155e30-9039-4395-b661-ea60717b4412.png)
-
Annotate the image by either:
- clicking PIN and then clicking on the image to place a pin,
- clicking ELLIPSE or RECTANGLE and clicking on the image once and moving the mouse to stretch out the shape to the desired size. Click again to set the final size; or
- clicking POLYGON and then clicking on the image to start the shape, continue to click as you move your cursor around the outline of the feature (double-click to finish drawing).
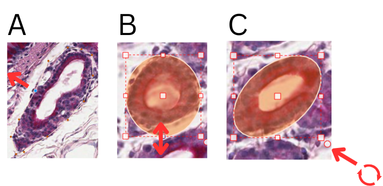
- Pins, shapes, or drawings can be moved by clicking and dragging. Shapes and drawings can be modified by clicking on the shape and dragging the small coloured circles at the edges.
- Rectangles and Ellipses can be resized by stretching the shape from the corners or sides.
- Shapes can be rotated by dragging the circle in the bottom right hand corner of the shape.
- Repeat the process if you would like to define multiple pins, shapes, drawings (or a combination) that relate to the same feature you are highlighting.
- Change the colour of the region or feature by clicking the colour bucket under shapes.
_a122f2aa-90e1-4c83-8185-d43f97b8fd52.png)
- Click Save.
- Click Back or Layer to mark more features by making a new Annotation.
For a demonstration watch:
Example annotation: Histological features of the Jejunum